So I've moved on and created the neck and glued it onto the shell. I haven't retrieved the pictures from my camera yet but will post them shortly.
Next up is the pegbox and rider.
Saturday, October 20, 2012

Sunday, September 30, 2012
Creating the soundboard
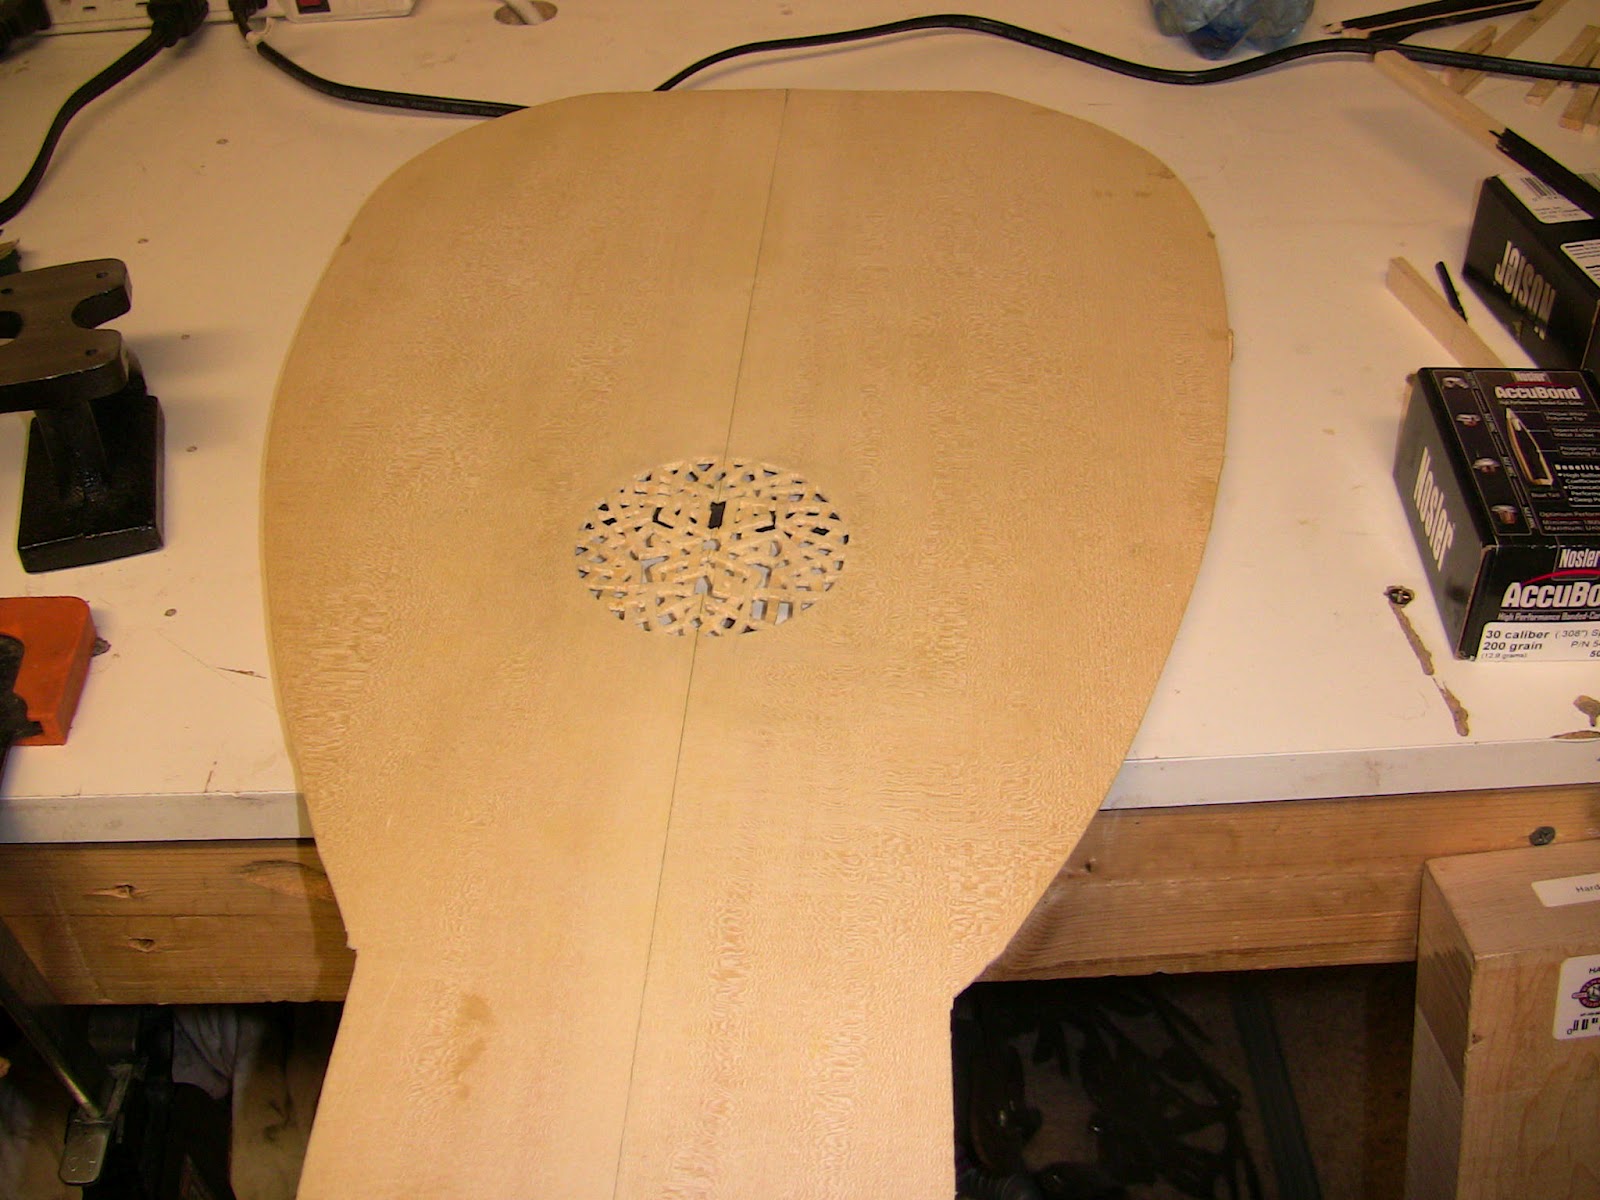
This soundboard is made from Englemann Spruce. I did not get as good of a seam when joining the two halves together as I would have liked as the glue gelled on me very quickly. I think it will hold fine it is just a bit unsightly. I didn't get any pictures of this step before cutting out the shape and the rosette.
 |
| So I first cut out the rosette design. This is a tough task for me! First a razor thin/sharp flat ended blade had to be ground and sharpened and the design is cut by cutting straight down into the pattern that gets glued onto the front. It could be better but I'm pretty satisfied with it given my lack of wood working skills! |

 |
| Here is a bit of a closer shot. |
 |
| Sorry this one is kind of dark but it is close enough with shadows to show the 3d chiseling. I need to do some very fine sanding/detailing to smooth out some edges. I may try the Dremel on slow speed with a very fine ceramic drum for this. |
 |
| Now gluing on the bars a couple at a time. |
 |
| Then setting weights on them to get a good fit. |
 |
| All bars are in place and trimming has begun! |
 |
| The trimmed bars completed! |
 |
| A closeup of the rosette support. |
 |
| Closeup of the trimmed bars at the bottom end. |

Friday, September 21, 2012
A completed shell

So the endclasp is glued on and I just need to drill a hole for the peg and the the shell is complete. Shown here clamped up and freshly glued.

Here you can see the 'false' soundboard used to help the shell keep its proper form during construction.

And here it is with the clamps off. Still needs some sanding and the spacer strips need to be dyed black as they lost their color during sanding.

Monday, September 17, 2012
Completing the shell

It's been a while since I've posted and I haven't gotten many pics but at this point
I've just completed getting all the ribs added and getting the endliner glued in and the glue strips inside the lute for reinforcement.
 The pictures aren't the best but we have moved since my last post and I'm not setup yet to get better ones.
Next I need to add the endclasp around the outside of the lute bottom and then begin working on the soundboard!


Saturday, May 5, 2012
Gluing ribs onto the neck block
So I've got several ribs in place now....
 I notice I've been planing the edges a bit much and maybe not quite forming them as well as I should. The result is that some of the ribs are not as wide as they should be. I will either need to make the last two ribs in each side a bit wider, or add one extra rib on each side...

The forming gets a bit tricky as you move down the sides, there is a twist at each end that if not just right ends up requiring too much planing to get it to fit flush against the previous rib.


I haven't had the opportunity to cleanup the glue mess from the last two ribs I put on yet...

I'm forming the next two ribs now. Still need to cut out the last 4 and shape those...getting eager to get on to the next stage of this project...
 I notice I've been planing the edges a bit much and maybe not quite forming them as well as I should. The result is that some of the ribs are not as wide as they should be. I will either need to make the last two ribs in each side a bit wider, or add one extra rib on each side...
The forming gets a bit tricky as you move down the sides, there is a twist at each end that if not just right ends up requiring too much planing to get it to fit flush against the previous rib.


I haven't had the opportunity to cleanup the glue mess from the last two ribs I put on yet...

I'm forming the next two ribs now. Still need to cut out the last 4 and shape those...getting eager to get on to the next stage of this project...
Friday, April 6, 2012
Forming the first couple of ribs
I started forming the first two ribs the other day. It takes a bit more work than I expected, especially for the ones off center. They have a twist in them that makes it take a little longer to get right. Also, planing down the edges to get a good perfect fit BEFORE putting in the spacers. But it's coming along and hopefully by the end of this weekend I can have the first 3 ribs fitted and start gluing!


As you can see, there are still some uneven gaps between these that I must correct before continuing...


As you can see, there are still some uneven gaps between these that I must correct before continuing...
Monday, March 26, 2012
Forming the Neck Block
The neck block is the first piece of wood that will become part of the instrument. It must be carved out in a faceted form to match the end of the mold where it is attached.


Then I played with bending a piece of the rosewood to get a feel for how it works.

 I need a bit more practice to smooth out the bends into a nice continuous curve but I'm getting close and should start putting the first ribs in place sometime over the next week!


Then I played with bending a piece of the rosewood to get a feel for how it works.


Subscribe to:
Posts (Atom)